Share
Pin
Tweet
Send
Share
Send
Metal foil and rhinestones shining like precious metals transform clothes, shoes and accessories!


These elegant cases are made from a small flap of genuine leather. Using the stamping kit (Leder Baumann) you can make any inscription or monogram on them.
Patterns are given above.
You will need:Hard skin flap: for a mobile phone case - approx. 15 x 20 cm, for credit card case - approx. 15 x 15 cm; letter embossing kit (Leder Baumann); sponge; shockproof substrate; hammer; sewing threads; silk paper.
Description of work:
Pattern A for the case of a mobile phone or pattern B for the case for credit cards should be re-printed onto silk paper, transferred twice with a ballpoint pen to the wrong side of the skin and cut out. Moisten one of the parts (front) and place it face up on the substrate. Place the necessary letters on the front part, stick the adhesive tape along the lower edges of the letters and mark the middle line of each letter on it. Letters are sequentially applied to the skin and embossed with a pin using two blows of the hammer (having previously tried on an unnecessary flap of skin). Leave the item overnight to dry. Then fold both parts together on the wrong side and grind side sections and lower sections to the edge.

Noble
Suitable party shoes (thermostases: Crystallized Metallics by Swarovski; ankle boots: C&A).
You will need:
Ankle Boots (C&A); pencil - phantom; silver color thermostrases (Swarovski).
Description of work:
On each ankle boot, draw vertical lines with an interval of 2 cm with a phantom pencil. Press the ankle boots tightly with newspapers. Place thermostrases on the ankle boots along the drawn lines. Put an iron on top of thermostats and iron thermostrases, firmly holding them. Allow to cool and remove the protective film.

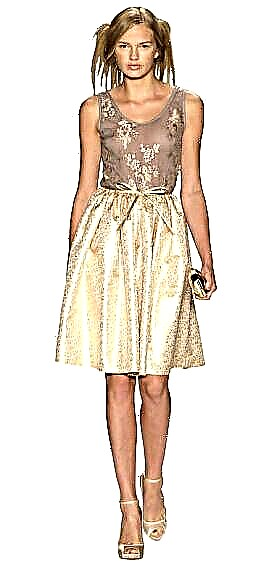
Royal outfit
Regular pullover (C&A) is decorated with thermostat mosaic.
You will need:
Slim Pullover (C&A); "magic" tailor's crayon; Gold and silver thermostrases (Swarovski).
Description of work:
At the front of the pullover, draw a line of the middle with a “magic” tailor's chalk. Position the thermostrases in front of the pullover as shown in the photo, or press them at random (through the iron). Remove the pullover and iron the rhinestones from the wrong side with strong pressure. Allow to cool and remove the protective film.
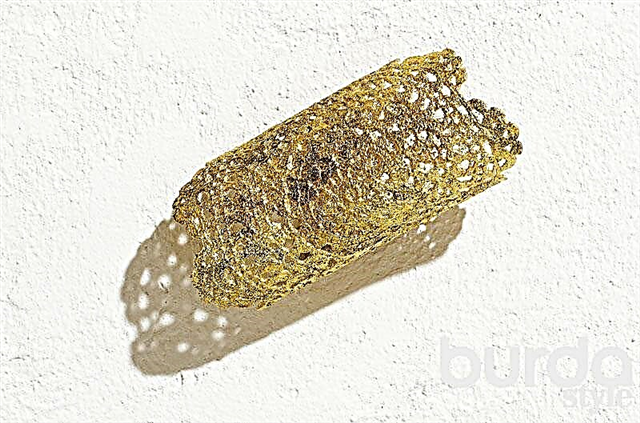
Gilt handle
Crocheted lace doily becomes a real designer masterpiece!
How to turn a napkin into a bracelet
You will need: napkin (diameter 14 cm), stiffener, foil glue, gold color foil, transparent varnish, brush, sponge, black acrylic varnish, chain clasp, plastic wrap, cardboard tube, pliers (2 pieces).
STEP 1 Wrap a damp cloth around a cardboard tube glued with foil (diameter approx. 6 cm) and leave to dry overnight.
STEP 2 Apply foil glue (Rico Design) on a napkin, let the glue seize for 20 minutes,then glue the gold foil flakes (Deco-Metall Flocken by Rayher) with a brush.
STEP 3 Remove the cardboard tube and use two pliers to attach the chain clasp (Rayher) to the symmetrical sides of the napkin.


INSTRUCTION
You will need:
Crocheted openwork napkin with a diameter of 14 cm; means for enhancing the stiffness of textiles (Rayher); adhesive for foil (Rico Design); gold color foil (Deco-Metall Flocken, Rayher); clear varnish (C. Kreul); brush; sponge; cardboard tube with a diameter of approx. 6 cm; black acrylic varnish (Waco); chain clasp (Rayher); film; two pliers.
Description of work:
Dip a napkin in a tool to increase the stiffness of the textile and squeeze it slightly, removing excess fluid. Wrap a napkin around a cardboard tube with a diameter of approx. 6 cm and leave to dry overnight. Apply foil glue to the napkin, allow the glue to set for 20 minutes, apply foil and glue it with a brush. For an antique effect, apply black acrylic varnish to the foil with a sponge with pressing movements. Let the varnish dry. Cover the napkin with clear varnish. Remove the cardboard tube. Attach parts of the chain fastener to the two opposite edges of the napkin using pliers.
Photo: Jan Schmiedel (9), Catwalkpix.com (2). Design: Rushana Jennings.
Share
Pin
Tweet
Send
Share
Send