Application, embroidery, painting, rhinestones, pompons, stickers - everything is possible for summer bags! 25 ways to decorate a summer bag with your own hands - in our selection.
1. Fabric bag with lemons

Photo: aliceandlois.com
To make bright and summer a simple fabric bag, paint it with a pattern of lemons! You will need acrylic paint for yellow and black fabrics, a brush, a waterproof substrate (for example, cellophane) and the bag itself. To start, wash, dry and iron the bag. Lay the backing inside so that the paint only hits the front of the bag. With yellow paint, draw lemons (first you can outline their contours with a pencil). When the paint is dry, add black dots. If this is required by the instructions, after drying, fix the paint with an iron.
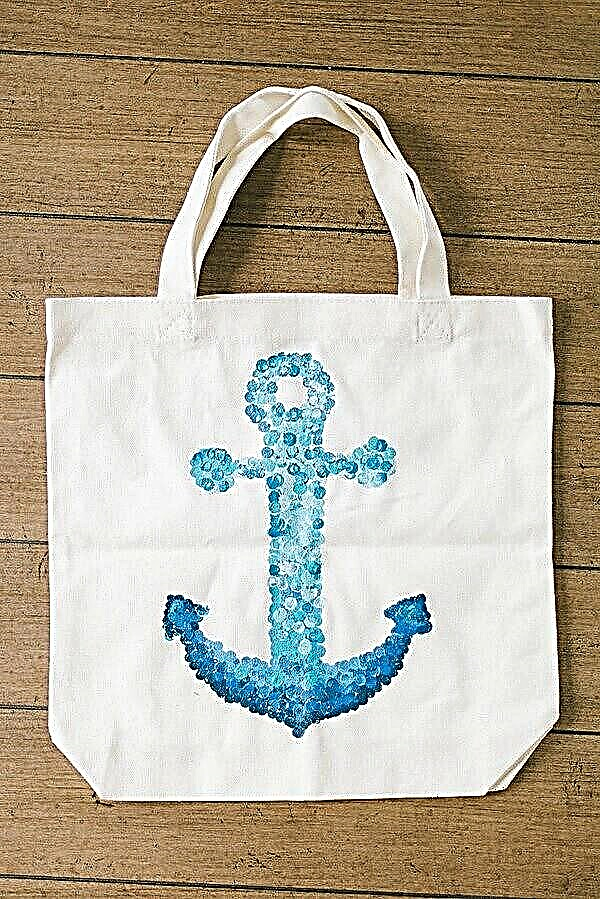
2. Fabric bag with an anchor

Photo: artistacafeceramique.com
To make such a painting, you need blue and white acrylic paints for the fabric, a small stamp (you can use the eraser on the back of the pencil), the bag itself, a cellophane substrate and a pencil for drawing. Find or draw an image of the anchor yourself and transfer it to the fabric of the bag. Put the backing inside the bag so as not to stain its back part with paint. Mix blue with white paint in different containers so that shades from blue to blue are obtained. Using the stamp, fill the contour of the anchor with paints. Dry the product and, if necessary, fix the paint with an iron.
3. Fabric bag painted with gold paint

Photo: hellowonderful.co
Paint with a metallic sheen contrasts very effectively with the texture of cotton or linen fabric from which the bag is sewn. In art or craft stores you can find various metallic acrylic paints - silver, gold, bronze, copper ... Choose your taste. Also stock up with masking tape, a stencil on which you will make the inscription, and a sponge or brush. To begin, mark the area of the bag below, which you will paint over, and glue masking tape along the border. Paint over the bottom of the bag and let it dry well. Then apply the inscription with the help of a stencil, dry it again and, if the instruction requires, fix the paint with an iron.
4. Bag with a bright square and a pattern

Photo: snapfish.com
You will need yellow acrylic for fabric, a brush or sponge, masking tape, a backing made of waterproof material, a permanent marker, a ruler, and a pencil. Wash, dry and iron the bag. Using a ruler with a pencil, draw a square and glue strips of masking tape along its edges. Place the backing inside the bag and paint over the square. Let the paint dry and draw a sketch with a pencil. Repeat drawing with a permanent marker. To fix the pattern, you can top cover it with colorless acrylic for fabric.
5. Fabric bag with stripes

Photo: bag-watch.org
You can make strips of one or different colors - for this you need the appropriate acrylic on the fabric, sponge or brush and masking tape. First, glue the strips of tape on the bag, leaving equal gaps. Then paint the gaps with paint and let it dry. Remove the tape and, if necessary, fix the paint with an iron.
How to sew a bag
6. Bag with gold decor and rainbow handles

Photo: damasklove.com
To turn an ordinary fabric bag into such a striking accessory, you will need golden acrylic for fabric, masking tape, a wide band of rainbow colors, pins and a sewing machine. Existing fabric handles from the bag must be torn off. Then we paint over the bottom of the bag with gold paint (how to do this - see point 3). When the paint dries, we outline the place of attachment of the new pens from the braid, pin the braid with pins and attach to the machine.
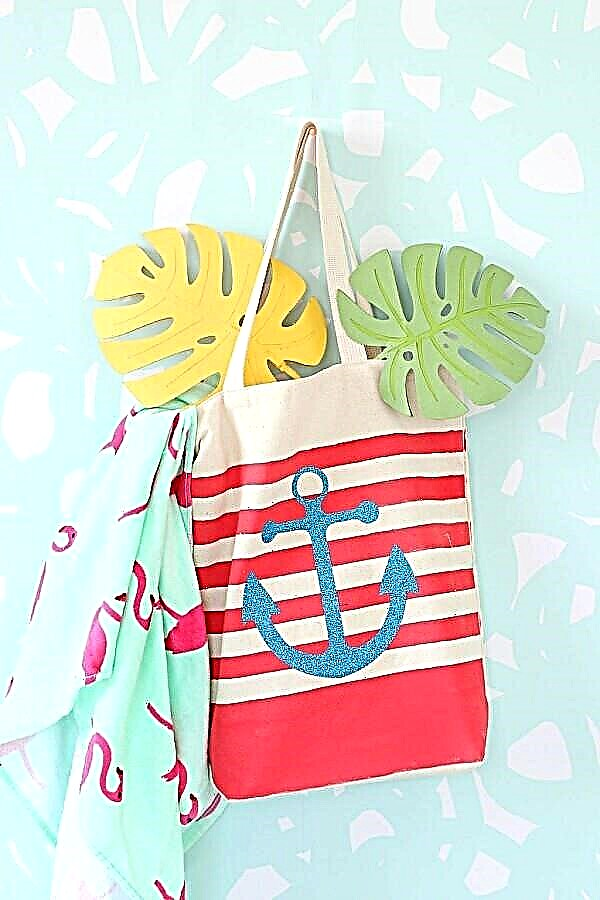
7.Beach bag with stripes and thermal sticker

Photo: damasklove.com
What your bag will be depends on the sticker you choose. In this case, it is an anchor. Before sticking the sticker, you need to decorate the bag with stripes (for how to do this, see paragraph 5). When the paint dries, place a sticker on the cloth and glue it with an iron. Done!
8. Bag with stripes and a bird

Photo: wobisobi.blogspot.com
This bag is almost completely painted with paint, and this gives it some advantages over a regular fabric bag. Firstly, acrylic paints make the fabric tougher, and the bag holds its shape better and becomes stronger. Secondly, after drying, acrylic gives the fabric water-repellent properties, so you can not be afraid to get such a bag in the summer rain or put a wet swimsuit on it on the beach. To colorize a bag, you need acrylic paints for several colors of fabric, a sponge or brush, masking tape, an image of a bird (you can draw it yourself). Wash, dry and iron the bag. Start applying color blocks one at a time (see step 5). Before applying a new color block, wait for the previous one to dry. Do not forget to paint the handles of the bag on both sides. At the end, draw a bird - done.
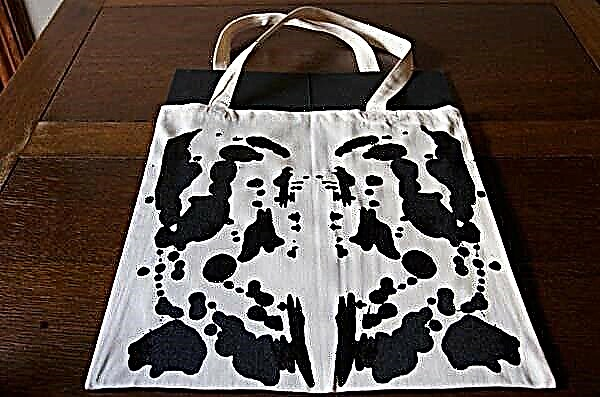
9. Bag with "Rorschach spots"

Photo: justdoiy.com
Herman Rorschach is a Swiss psychiatrist and psychologist who invented a test to help determine what people have in their hearts using abstract spots. A bag with "Rorschach spots" will show you as an educated, ironic and extraordinary person, and to make such a decor simple. You will need black acrylic for fabric, a thinner for acrylic, cellophane for the backing. Wash, dry and iron the bag first. Then fold it in half lengthwise and iron it. Now put the backing inside (so you do not stain the fabric of the back of the bag). Dilute the black acrylic for the fabric with a small amount of thinner so that it becomes liquid enough and pour the paint on one half of the bag so that abstract stains appear. Immediately fold the bag along the ironed fold and press it so that the ink prints mirrored on the second half. It remains to dry the bag and fix the paint with an iron.
10. Watermelon bag

Photo: madame-citron.fr
To color the bag like this, you need liquid paints for the fabric (and regular acrylic for the fabric or indelible marker to draw the bones). Liquid paint needs two colors: red and saturated green. According to the instructions, dilute the paint in water in a wide container. Start with red. Dip the bottom of the bag into the paint so that the paint saturates the desired area of fabric. Hold the bag in the paint for as long as required. Then, in the same way, paint on the green top and the handles of the bag. As a rule, rinse the fabric after staining (follow the instructions). When the bag is dry, draw watermelon bones with acrylic or marker.
We sew and decorate a bag made of fabric: 4 workshops and 16 ideas
11. Bag with marker

Photo: hepinksamurai.com
The easiest way to add personality to your bag is to make the inscription or drawing a marker for the fabric. The main thing is to find the indelible marker (these are sold in needlework and art stores). To make the drawing more even, it’s better to wash the bag, dry it and iron it before work, you can also pull it on a kind of tablet. You can draw a drawing with a pencil first, and then draw a marker around it.
12. Bag with ombre stain and pompom

Photo: kristineldridge.com
For such staining, liquid paint is needed for the fabric (for example, for batik). Dilute the paint with a small amount of water in a wide container. Moisten the bag well with spray water. Immerse the bottom of the bag in a container of paint and wait until the paint saturates the bag the way you like. If paint instruction so requires, rinse the bag afterwards. It remains to add a pompom as a keychain to the color.
13. Bag with ombre step dyeing

Photo: glamourandgraceblog.com
To do this, follow the instructions in p. 12.The difference is that the whole sequence of actions for coloring needs to be repeated three times, each time immersing the bag in the paint at a certain level to get "steps".
14. Bag with stripes of colored fabric

Photo: modpodgerocksblog.com
For this decor, you will need a patch of colored fabric, glue for the fabric, a roller knife and a mat-pad for needlework (or sharp scissors and attention), a pencil and a ruler. First, cut a piece to fit the patch to fit. Using a pencil and a ruler, mark strips of equal width on the details and cut them. Now each strip must be carefully glued to the bag at an equal distance from each other.
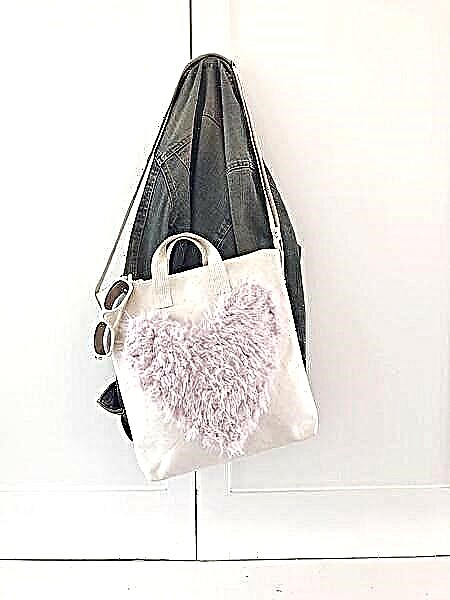
15. Bag with a "fur" pocket applique

Photo: mamookids.com
The heart made of “fur” on this bag is not just an applique, but also a convenient pocket for small things. To decorate the bag with such decor, cut out two identical details of the heart from a suitable fabric. Fold the parts with their sides inward and stitch them on the machine, leaving a hole for turning out. Turn out a pocket, sew a hole manually and sew a pocket to a bag.
We turn a simple shirt into an unusual one: 3 workshops and 20 ideas
16. Bag with a "ballerina"

Photo: hellowonderful.co
It’s so good to decorate a bag for a girl, but if you yourself like ballet or unusual decor - why not? You will need threads and a needle for embroidery, fabric for a ballerina's skirt - chiffon, tulle and so on, a suitable ribbon. First we outline the pattern on the bag and embroider it. Then we cut out the rectangular part of the skirt, we pick it up, wrap it with tape and sew it to the bag.
17. Bag - "bunny"

Photo: iwearthecanvas.blogspot.com
Another option for decorating bags for girls. You will need: a suitable fabric for the "ears", a sewing machine, an iron, threads for a pompom, threads for embroidery, a needle for embroidery, scissors. First we make “ears”: we cut from the fabric 4 identical ones were made, grind in 2, folding them with their faces inward, twist, iron and sew to the bag. Then you need to outline the pattern of embroidery of the eyes and mustache of the hare and embroider. At the end we make a pompom and sew on the nose.
18. Bag with "fruit and vegetable" pompons

Photo: damasklove.com
Great for summer shopping trips! To make such a decor, you will need threads of different colors for embroidery and pompoms, a device for making pompoms, a needle for embroidery and scissors. Decide which “vegetables” and “fruits” you will depict, and make pompons of the appropriate color and size. If you need an oval shape, you can cut the pompom accordingly. Now we outline the pattern of embroidery on the bag, embroider and sew the pompons. Done.
19. Bag with a stamp pattern

Photo: tallersmariavictrix.blogspot.com
This method will help you to make a simple monochrome fabric for stamps with a print fabric - and you can choose a print yourself. You can find ready-made stamps in a handicraft store or do it yourself, for example, by cutting a cork from a bottle, from an eraser, or from a piece of thick linoleum using a breadboard knife. You will also need acrylic paints for fabrics of one or different colors - pour them into convenient containers. Dip the dies in the paint and apply to the fabric. After finishing the work, let the paint dry and fix it with an iron.
20. Bag embroidered with rhinestones

Photo: damasklove.com
For this decor, you need acrylic paint for the fabric (in this case, turquoise), a sufficient number of rhinestones of various shapes, a brush, thread and a needle (or glue). First, draw a rectangle with paint (put cellophane inside the bag so that the paint does not get on the back of the bag). When the paint dries, spread the rhinestones on top and sew or plant on glue.
Beads, beads and rhinestones clothing decor: 33 ideas
21. Bag with a "gilt" decor

Photo: brit.co
Such a decor can be done using metallic paint for acrylic, or glue and sheets for patination (the second option is somewhat more complicated). In either case, you need a wide, hard paint brush.If you use paint, then dip the tip of the brush into the paint and make free strokes. If you use patina sheets, dip the brush into the glue, make strokes, and then, applying the sheet to the glue, create a patina effect.
22. Bag with a rainbow inscription

Photo: blog.consumercrafts.com
To make such an inscription, you will need multi-colored indelible markers for fabric, an adhesive film, a felt-tip pen and a breadboard knife. First, on the film, you need to draw the contours of the future inscription, and then carefully cut them with a knife to make a stencil. We glue the stencil on the bag and color the letters with multi-colored markers.
23. Violet bag

Photo: designsponge.com
This drawing turns out to be as realistic as possible - after all, fresh flowers are used to create it! You will need a certain number of violet flowers (or other saturated colors), masking tape, scissors, paper towels, a hammer (a wooden one is suitable for beating meat, you will need to use its smooth side), colorless matte acrylic varnish. Cut the green parts from the flowers and lay them face down on the bag. Glue each masking tape. Cover with a paper towel and tap with a hammer. The pattern is printed on the fabric. Remove the flowers with scotch tape, dry the pattern and varnish for strength.
24. The ruler bag

Photo: sayyes.com
For such a "school" decor, you will need indelible felt-tip pen for fabric, red threads and a needle for embroidery, a ruler and a pencil. Iron the bag and place it on a flat surface. Using a felt-tip pen on a ruler, draw straight lines at the same distance. Then draw a line of the “fields” with a pencil and embroider it with a chain stitch.
25. Bag with flower applique

Photo: diaryofamadcrafter.wordpress.com
For such decor, multi-colored shreds of fabric left over from previous projects are suitable. We also need scissors, a cobweb, paper and a pencil. Draw on paper and cut out petal patterns of several sizes. Using the templates, cut out the details of the flower petals from the fabric and the "spider line". Lay out the letters on the bag in a pattern and glue them on the spider line with an iron.


